This guide will show you step by step how to send MIDI to an Overloud plugin when inserted in a DAW. In particular we will focus on 6 DAWs:
-
Reaper
-
Sonar
-
Pro tools
-
Cubase
-
Ableton Live
-
Logic Pro X
Other DAWs send the MIDI to the virtual instruments only and not to the effect plugins.
Basically the idea is to create an Audio track in which we open the Audio plugin we want to control with MIDI.
Than we create a MIDI track as well whose purpose is to route the MIDI messages from the MIDI input to the plugin.
Now let’s see how this can be done in the DAW listed above
REAPER
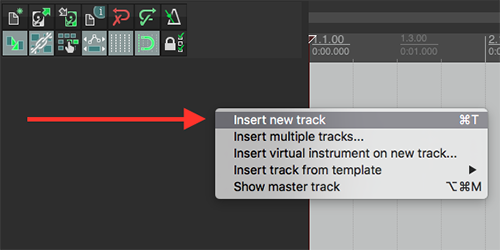
As a first step insert 2 tracks.
Right click and select “insert new track”
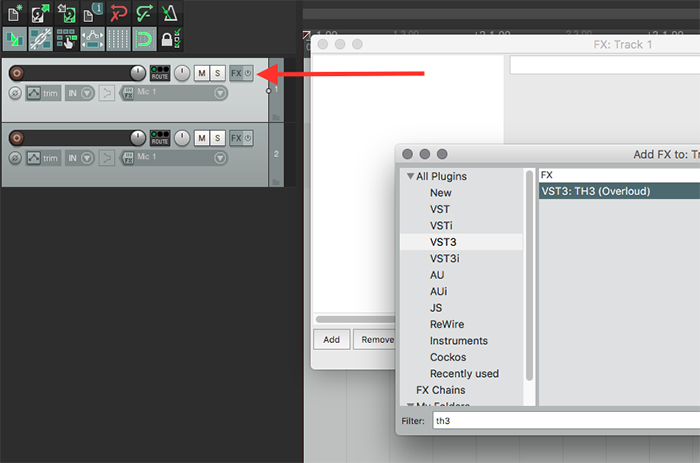
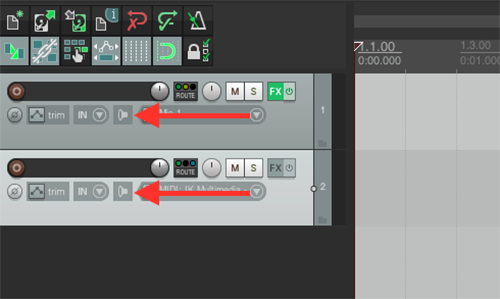
Now load the plugin on the first track.
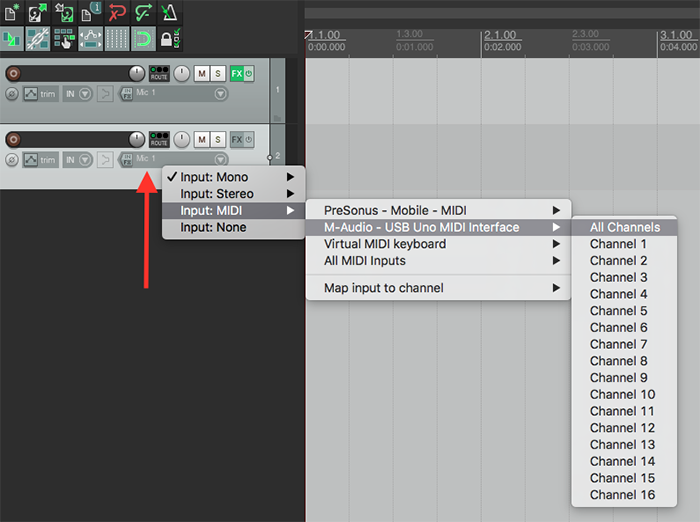
On the other track set the input control on MIDI and select your MIDI interface.
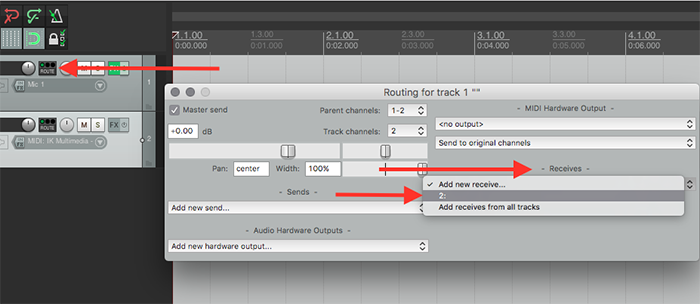
On the First track click on the “Route” button, a new window will be opened.
In that window click on the “Receives” panel and select the second track.
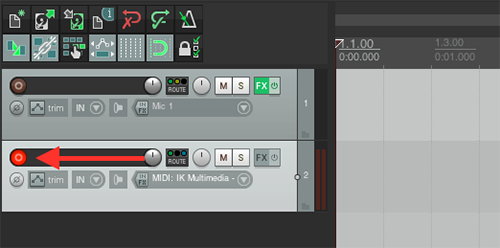
Switch on the “Record monitoring” on both the tracks.
Arm the record on the second track as showed in the following image.
At this point you can use your MIDI interface and a Overloud plugin in Reaper.
SONAR
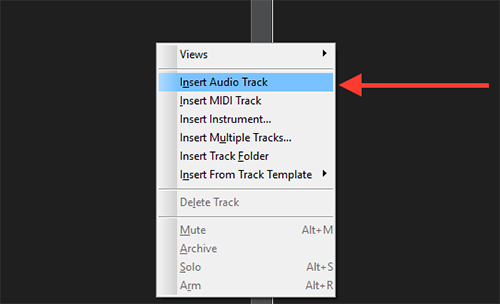
As first step insert an audio track.
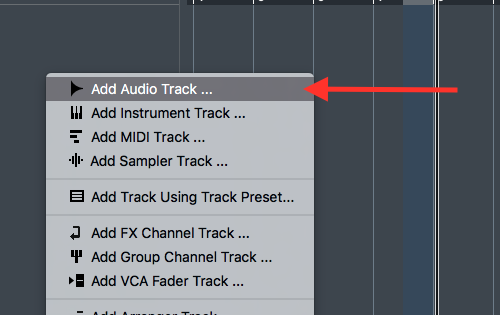
Right click and select “Insert Audio Track”.
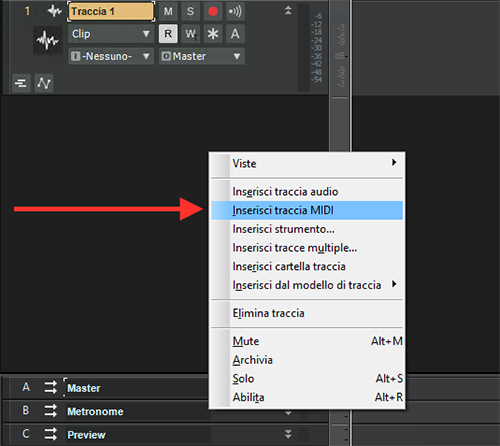
Now in the same way insert a MIDI track.
After that load the plugin on the audio track, TH3 in this example.

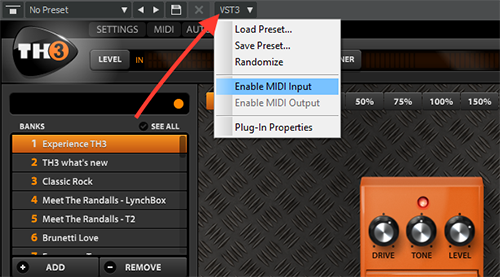
Once you have loaded the plugin, on the top bar of the plugin you can see a button called VST3. Click on that button and then click on “enable MIDI input”.
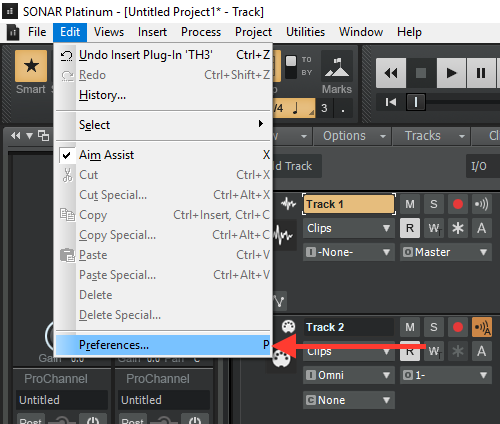
Now open the Sonar preferences panel by selecting the Edit menu -> Preferences…
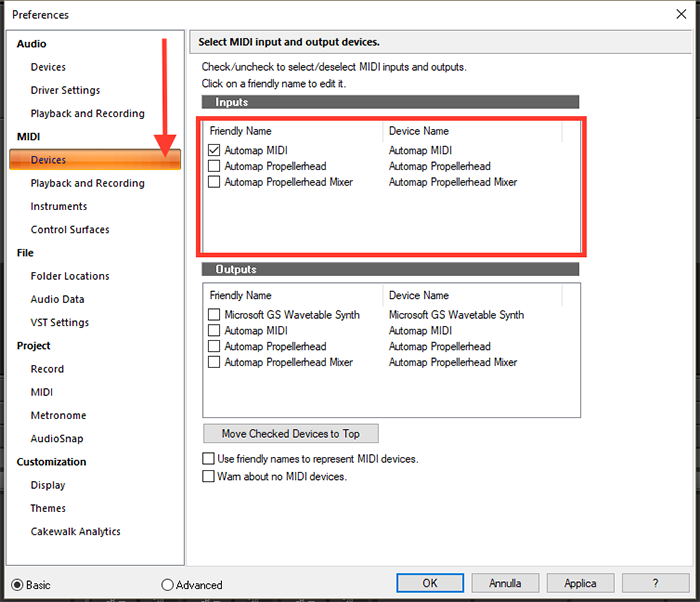
In the Preferences panel select MIDI -> Devices and check the MIDI interface you want to use, in this example “Automap MIDI”.
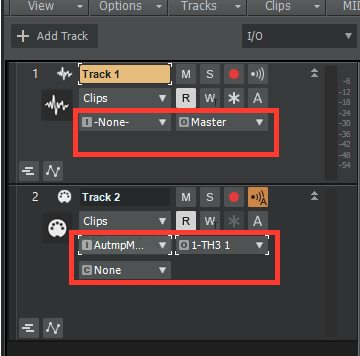
Check the input/output settings of the tracks: the MIDI track should have as input your MIDI interface and as output TH3 (or any other plugin you choose to use) as shown in the picture below.
At this point you can use your MIDI interface and a Overloud plugin in Sonar.
PRO TOOLS
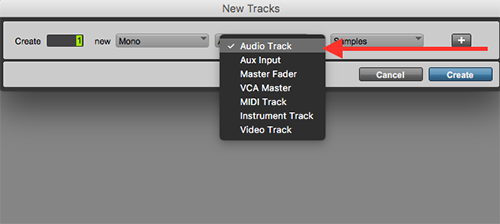
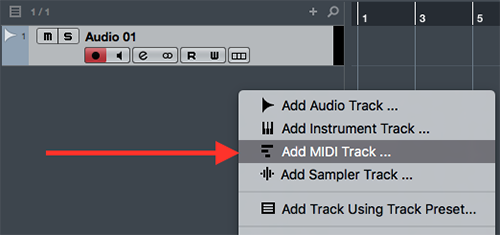
The first step is to insert 2 tracks: one Audio track and one MIDI track as shown in the following images.

Now load a Overloud plugin (like TH3) on the audio track.
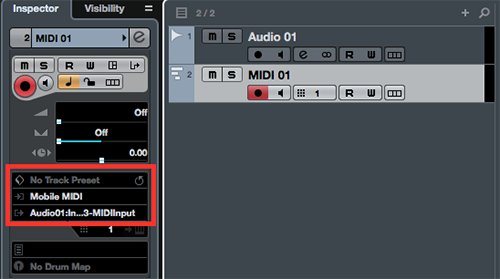
Check the input/output setting of the tracks: the MIDI track should have as input your MIDI interface and as output TH3 (or any other plugin you choose to use).
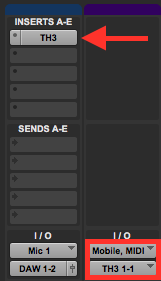
At the end what you will see is this:

At this point you can use your MIDI interface and a Overloud plugin in Pro tools.
CUBASE
Due to a limitation on the VST3 protocol into Cubase, in order to send MIDI to a plugin we need to open the VST2 version.
To start insert an Audio track.
Then a MIDI track.
Load on the Audio track the Overloud plugin that you want to use, for example TH3.

Check the input/output setting of the tracks: the MIDI track should have as input your MIDI interface and as output TH3 (or any other plugin you choose to use) as shown in the picture below.
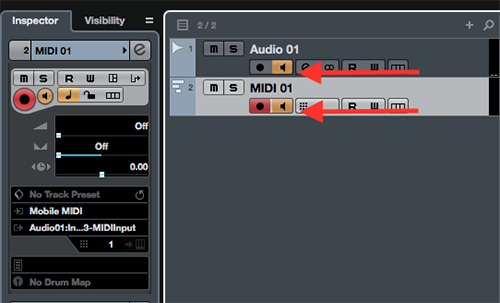
Activate the Monitor setting on both the MIDI and the Audio tracks.
At this point you can use your MIDI interface and a Overloud plugin in Cubase.
ABLETON LIVE
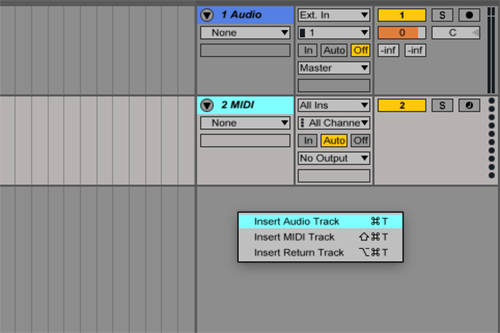
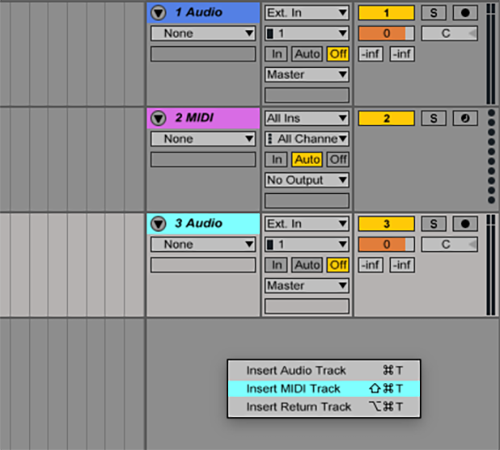
The first step is to add 2 tracks: one Audio track and one MIDI track as shown in the following images.
To do that right click on the track area and select first “Insert Audio Track” and than “Insert MIDI Track”.
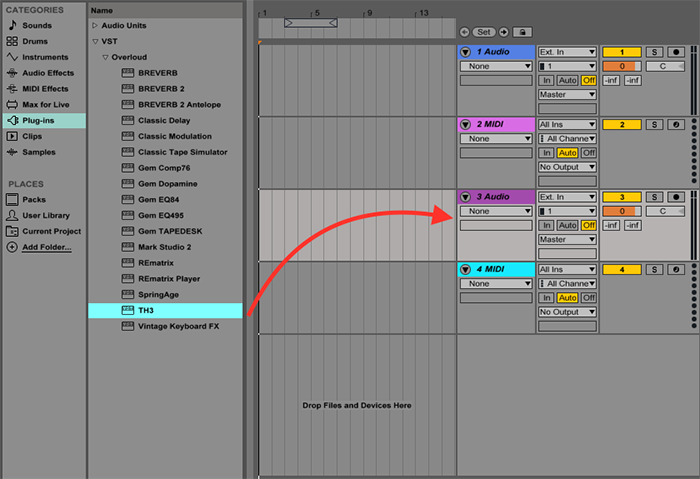
Now load on the Audio track the Overloud plugin that you want to use, for example TH3.
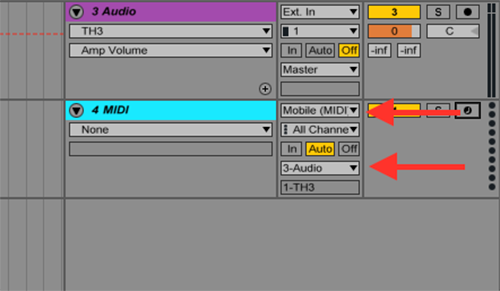
Check the input/output setting of the tracks: the MIDI track should have as input your MIDI interface and as output the audio track in which you have load the plugin as shown in the picture below.
Now arm the arrangement recording on the MIDI track.
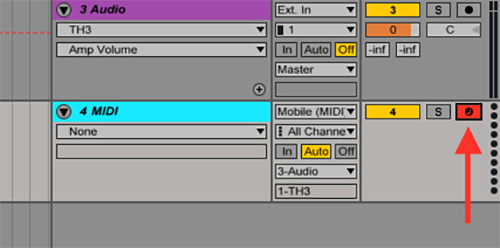
At this point you can use your MIDI interface and a Overloud plugin in Ableton Live.
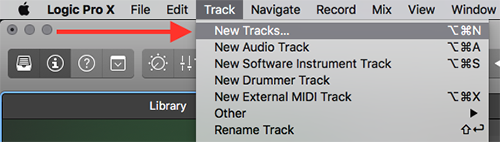
Logic Pro X
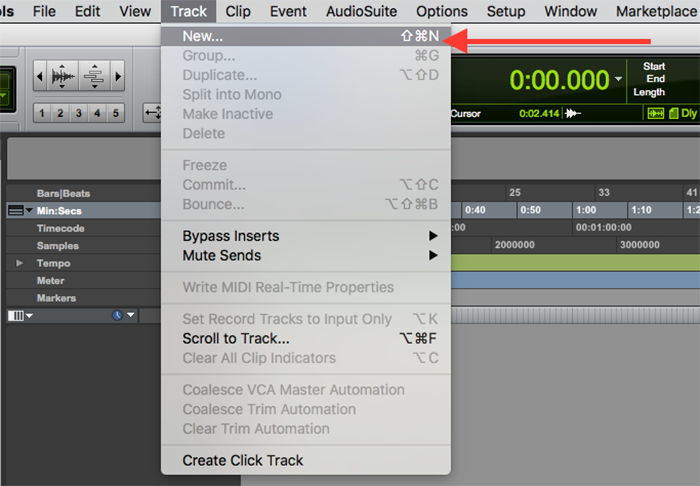
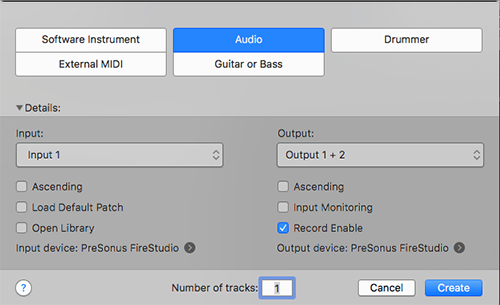
Add a “software instrument track” by clicking on the Track menu in the top side of the window and selecting “New Tracks...”
Set the instrument menu at “Empty Channel Strip” and the Output menu at “Output 1+2”.
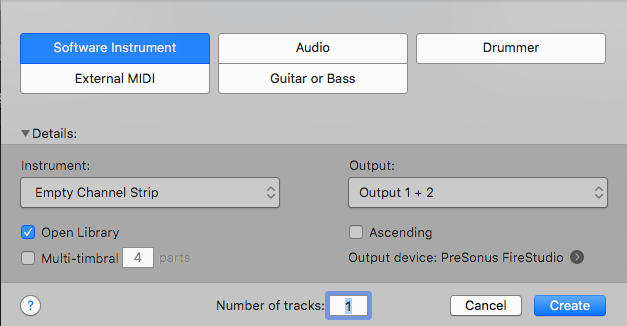
At this point you should see something like that:
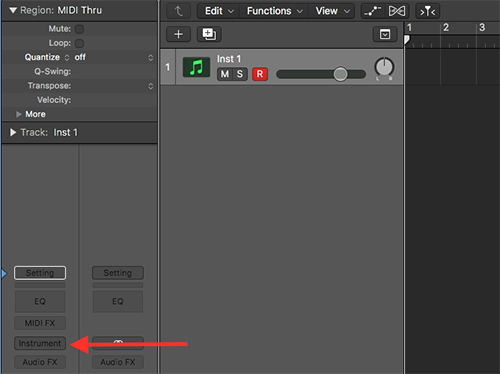
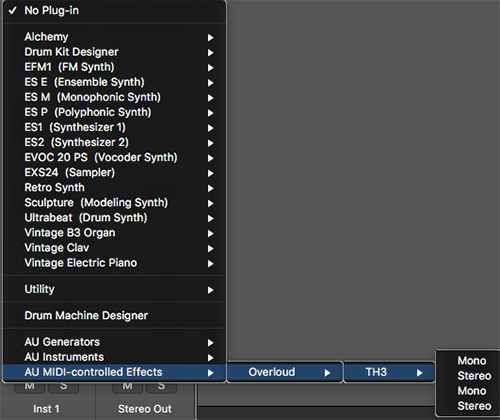
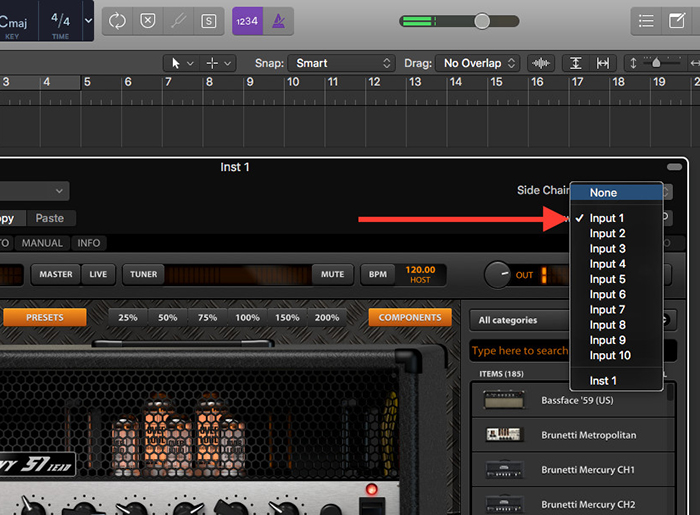
Click on the Instrument button like showed in the images and select TH3 or another plugin that you want to use.
In the Side Chain menu of the plugin window select the Input to which you have connected the instrument that you want to precess in real time (in the case of this example it is Input 1).
If you want to record what you are playing, add an audio track and set the input menu at “input 1” and the output menu at “Output 1+2”.
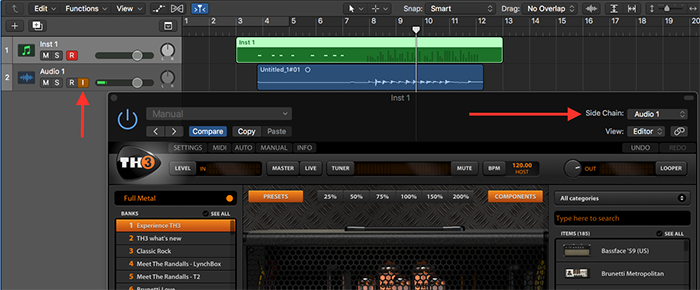
Then in the TH3 window set the Side Chain at “Audio 1”.
Also the Input monitoring and the record button should be switched on in order to enable the real time processing.
At this point you can use your MIDI interface and a Overloud plugin in Logic Pro X.